Getting Started
Once you have installed smif (see Installation and Configuration), the quickest way to get started is to use the sample project.
This section walks through setting up the sample project and extending it to configure models and data.
If you prefer to start with an overview of the concepts that smif uses, these are documented in Concepts.
Setup
First, check smif has installed correctly by typing on the command line:
$ smif
usage: smif [-h] [-V] [-v] {setup,list,app,run} ...

Command line tools for smif

positional arguments:
{setup,list,app,run}  available commands
    setup               Setup the project folder
    list                List available model runs
    app                 Open smif app
    run                 Run a model

optional arguments:
-h, --help            show this help message and exit
-V, --version         show the current version of smif
-v, --verbose         show messages: -v to see messages reporting on
                        progress, -vv to see debug messages.
You can also check which version is installed:
$ smif --version
smif 1.0
Command-line examples
Commands that can be run in a terminal or command line are written prefixed with a $. This means you can copy the rest of the line to run - don’t copy or type the $ itself.
Sample Project
Make a new directory and copy the sample project files there by running:
$ mkdir sample_project
$ cd sample_project
$ smif setup
$ ls
config/ data/ models/ planning/ results/ smif.log
On the command line, from within the project directory, type the following command to list the available model runs:
$ smif list
energy_central
energy_water_cp_cr
Note that the -d directory flag can be used to point to the project folder,
so you can run smif commands from any directory:
$ smif list -d ~/projects/smif_sample_project/
...
smif also comes with a web-based user interface, which helps to manage project configurations. The app can be started within a project configuration directory:
$ smif app
Opening smif app

Copy/paste this URL into your web browser to connect:
    http://localhost:5000

Close your browser then type Control-C here to quit.
Copy/paste or type the URL http://localhost:5000 into a web browser to open the app.
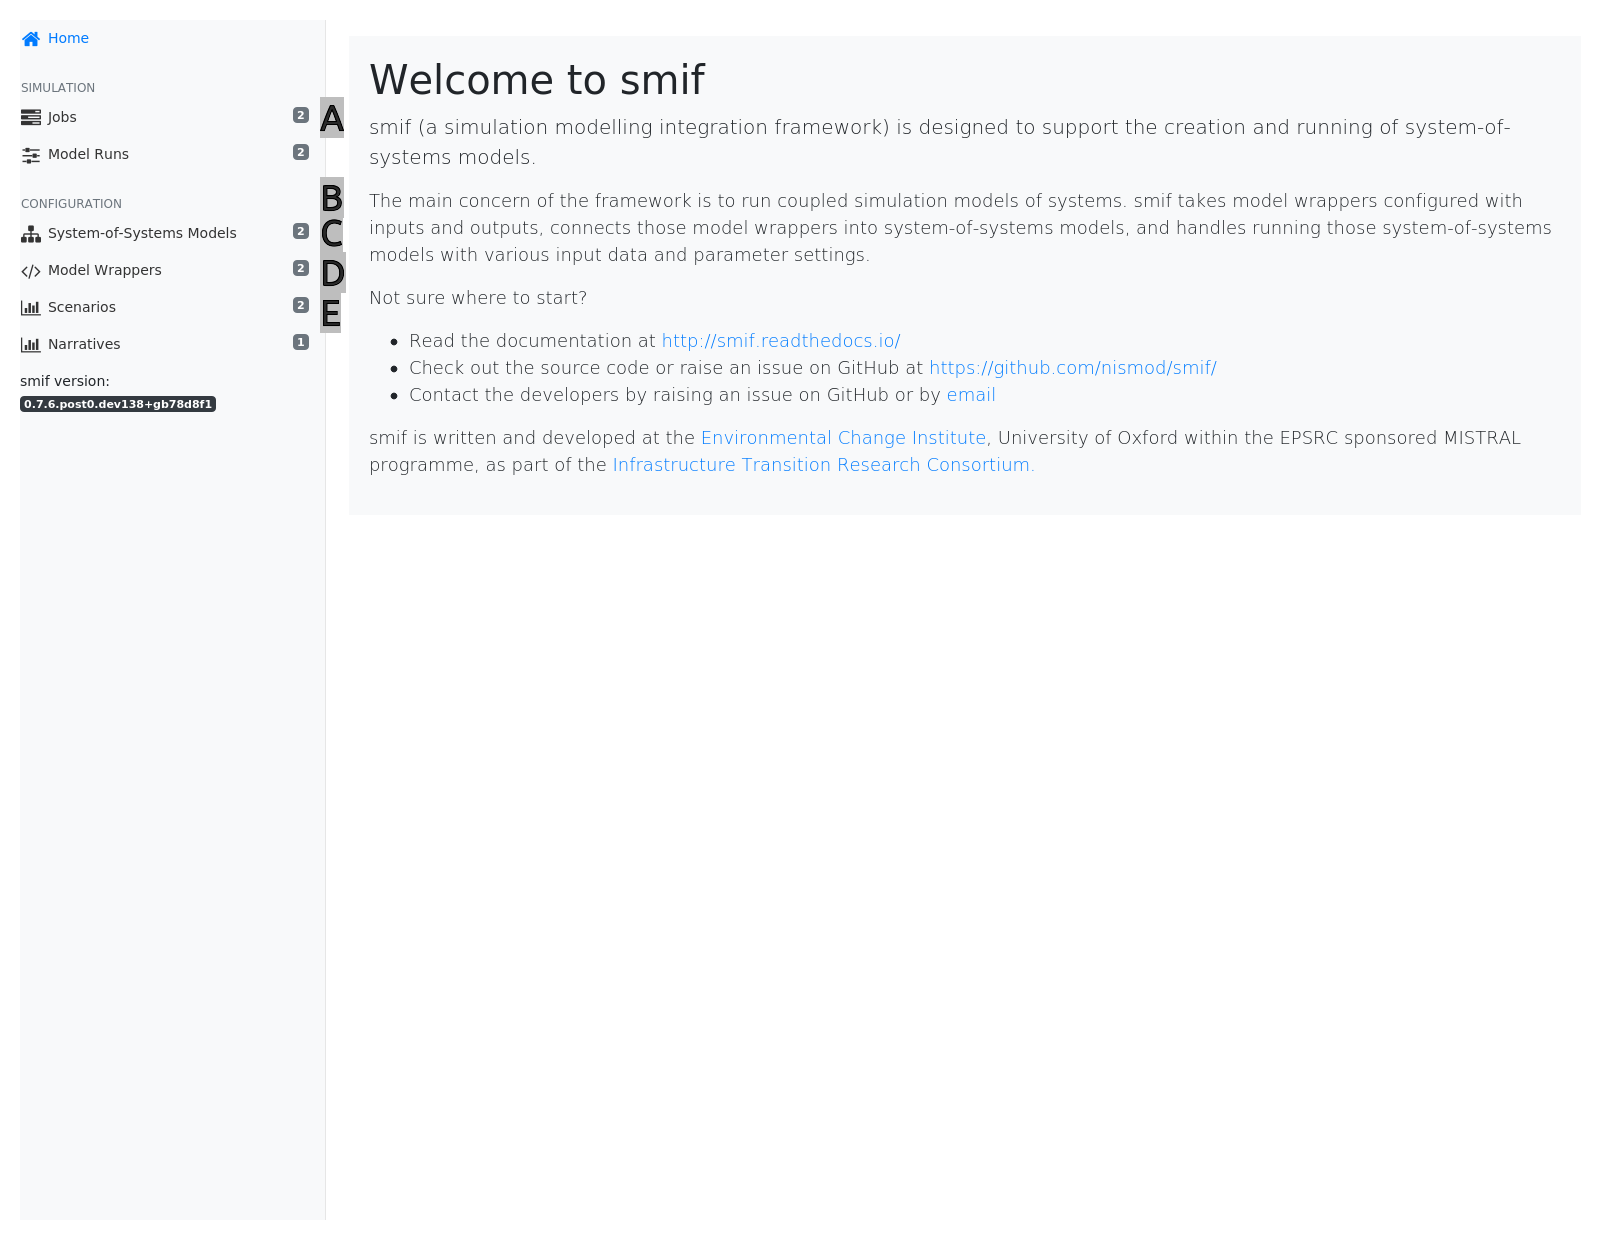
The Smif app welcome screen
Hints
[A] Model Runs - model configurations to run (or which have been run in the past)
[B] System-of-Systems models - integrated models which can be configured and run
[C] Model Wrappers - individual models which can be composed into System-of-Systems models
[D] Scenarios - exogenous data to provide inputs for models
[E] Narratives - combinations of parameters to configure models
Run a model
To run a model run, type the following command:
$ smif run energy_central
Model run complete
Groups of model runs can run as a batches by using the -b flag and a path to a batch file:
$ smif run -b batchfile
A batch file is a text file with a list of model run names, each on a new line, like:
energy_central
energy_water_cp_cr
Or, in the app, go to the “Job Runner” screen.
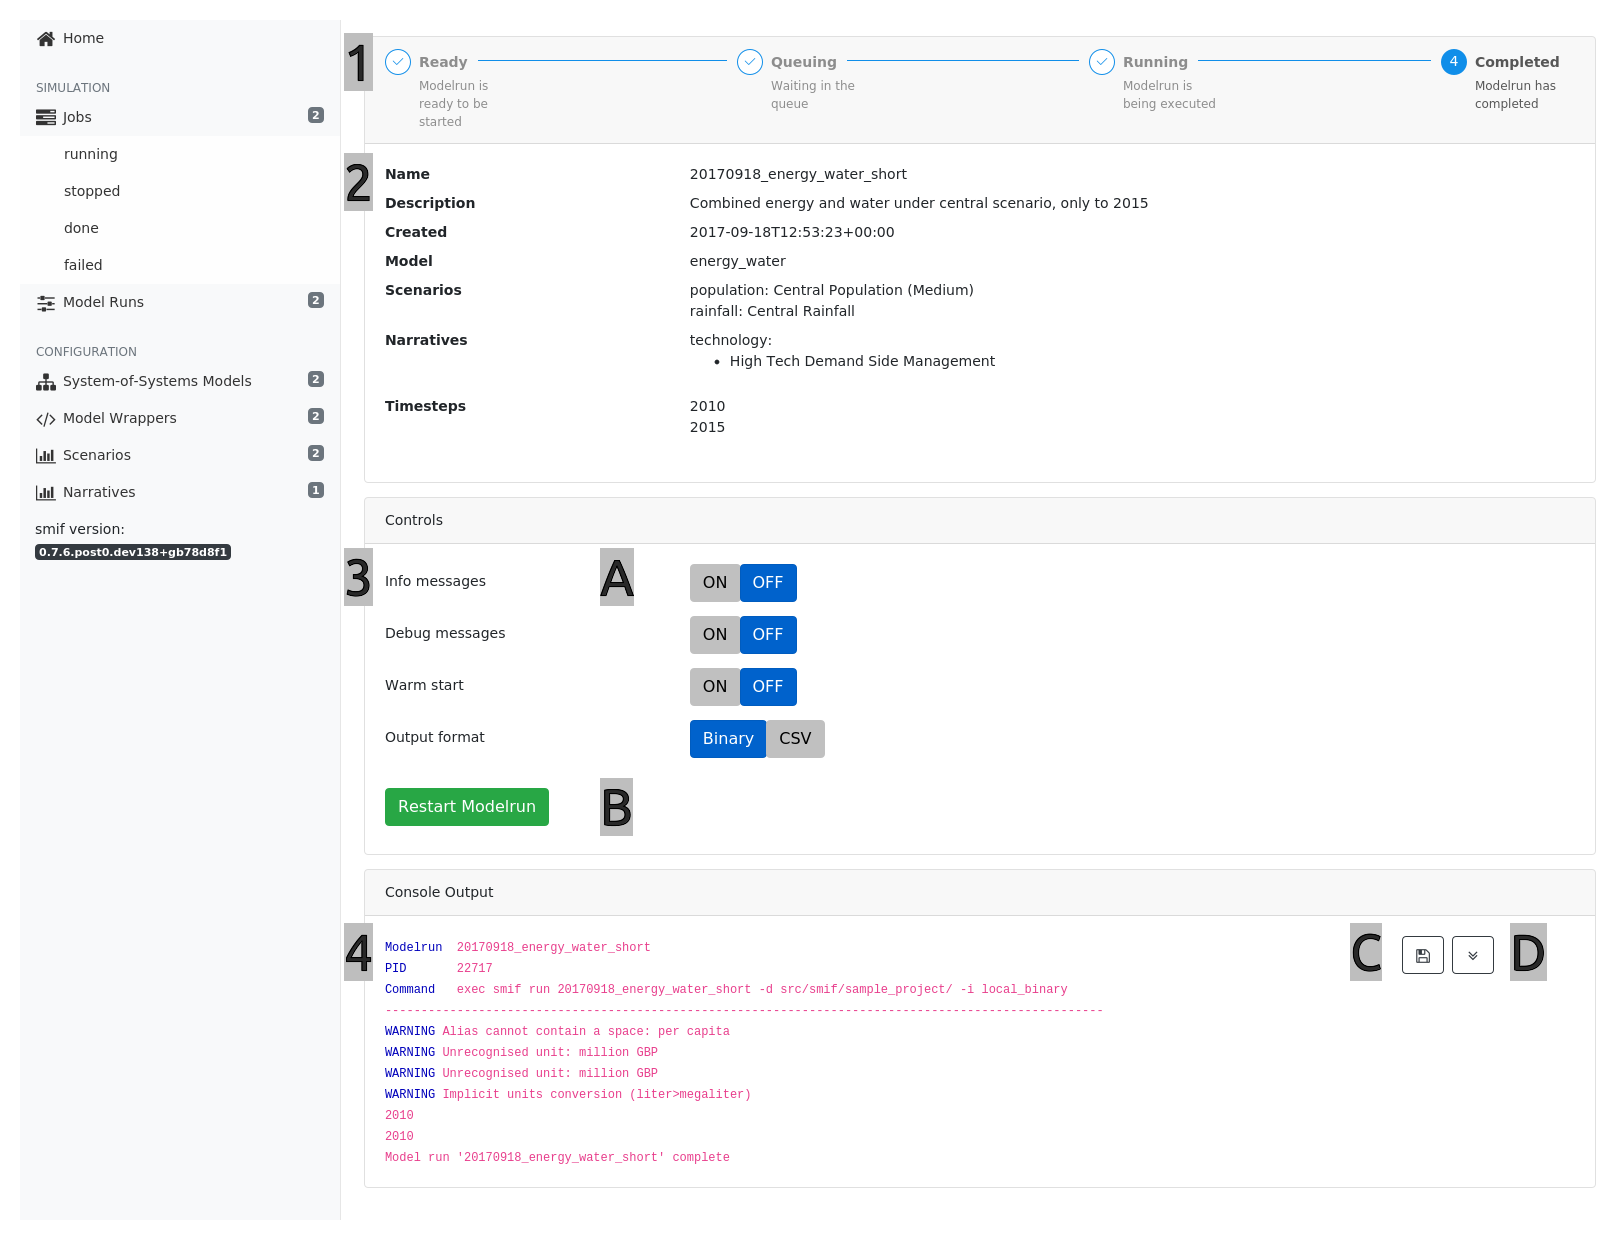
The Job Runner
| # | Section | Notes |
|---|---|---|
| 1 | Stepper | Displays the status of the Modelrun job |
| 2 | Modelrun Configuation | Provides an overview of the Modelrun configuration |
| 3 | Controls | Provides run settings and a start/stop button for the Modelrun job |
| 4 | Console Output | Real-time output from the Job runner process |
Hints
[A] Change the verbosity or output format of the Job Runner
[B] Start / Restart or Stop a Modelrun Job
[C] Save the console output to disk
[D] Click on the down-arrow button to follow the console output as the job runs
View results
Results are saved to the filesystem (depending on the storage interface used) in the
results directory in the sample project.